Functional programming using SML/NJ

So I started collecting some basic SML ideas that are useful when one encounters a course website or a tool that is coded in SML/NJ. It is a work in progress.

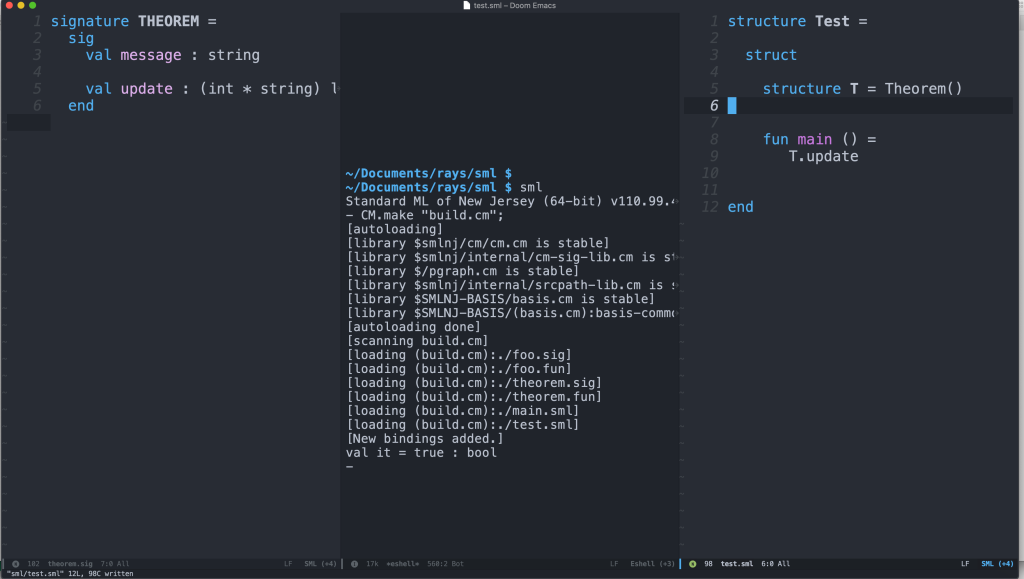
The first aspect to consider is the IDE. Mine is now Doom Emacs. Why ?

group
(* CM allows you to selectively export defined modules (structures,
signatures and functors) by listing them here. It's useful for
libraries. *)

source (-) (* export all defined modules *)

structure Main (* OR, export selectively *)
signature FOO
functor Foo
structure Test(* OR, export selectively *)
signature THEOREM
functor Theorem
is
(* Import the SML standard library, aka Basis. *)
(* See: http://sml-family.org/Basis/ *)
$/basis.cm

(* Import the SML/NJ library *)
(* Provides extra data structures and algorithms. *)
(* See: https://www.smlnj.org/doc/smlnj-lib/Manual/toc.html *)
$/smlnj-lib.cm

(* List each source file you want to be considered for compilation. *)
./main.sml
./foo.sig
./foo.fun
./test.sml
./theorem.sig
./theorem.fun

The main purpose is a straightforward build and test environment. I don’t code SML but port it to Racket or OCaml. I copy pieces of code and test them. So here a _Functor_ is used only for convenience. There is no attempt to abstract anything.

And I will strive to add more details as I learn.

Distributed Training using TensorFlow Federated

This is a very simple example of using multiple GPUs using a Jupyter Notebook to train a model. Obviously this involves multiple machines or VMs or in this case multiple processes in a simple Compute instance. Multiple processes in a single VM make it easier to test.

GPUs seem to be a costly affair.

I connected using SSH and these are the details of the VM

======================================
Welcome to the Google Deep Learning VM
======================================

Version: tf2-gpu.2-8.m92
Based on: Debian GNU/Linux 10 (buster) (GNU/Linux 4.19.0-20-cloud-amd64 x86_64\n)

Resources:
 * Google Deep Learning Platform StackOverflow: https://stackoverflow.com/questions/tagged/google-dl-platform
 * Google Cloud Documentation: https://cloud.google.com/deep-learning-vm
 * Google Group: https://groups.google.com/forum/#!forum/google-dl-platform

To reinstall Nvidia driver (if needed) run:
sudo /opt/deeplearning/install-driver.sh
TensorFlow comes pre-installed with this image. To install TensorFlow binaries in a virtualenv (or conda env),
please use the binaries that are pre-built for this image. You can find the binaries at
/opt/deeplearning/binaries/tensorflow/
If you need to install a different version of Tensorflow manually, use the common Deep Learning image with the
right version of CUDA

Linux distributedtraining 4.19.0-20-cloud-amd64 #1 SMP Debian 4.19.235-1 (2022-03-17) x86_64

The programs included with the Debian GNU/Linux system are free software;
the exact distribution terms for each program are described in the
individual files in /usr/share/doc/*/copyright.

Debian GNU/Linux comes with ABSOLUTELY NO WARRANTY, to the extent
permitted by applicable law.


(base) root@distributedtraining:~# nvidia-smi
Wed May 25 04:59:48 2022       
+-----------------------------------------------------------------------------+
| NVIDIA-SMI 470.57.02    Driver Version: 470.57.02    CUDA Version: 11.4     |
|-------------------------------+----------------------+----------------------+
| GPU  Name        Persistence-M| Bus-Id        Disp.A | Volatile Uncorr. ECC |
| Fan  Temp  Perf  Pwr:Usage/Cap|         Memory-Usage | GPU-Util  Compute M. |
|                               |                      |               MIG M. |
|===============================+======================+======================|
|   0  Tesla T4            Off  | 00000000:00:04.0 Off |                    0 |
| N/A   64C    P0    29W /  70W |      0MiB / 15109MiB |      0%      Default |
|                               |                      |                  N/A |
+-------------------------------+----------------------+----------------------+
|   1  Tesla T4            Off  | 00000000:00:05.0 Off |                    0 |
| N/A   59C    P0    30W /  70W |      0MiB / 15109MiB |      0%      Default |
|                               |                      |                  N/A |
+-------------------------------+----------------------+----------------------+
                                                                               
+-----------------------------------------------------------------------------+
| Processes:                                                                  |
|  GPU   GI   CI        PID   Type   Process name                  GPU Memory |
|        ID   ID                                                   Usage      |
|=============================================================================|
|  No running processes found                                                 |
+-----------------------------------------------------------------------------+

Build Jupyter

Since my automatic build failed I built myself. Not sure why it should fail.

radhakrishnan_mohan@distributedtraining:~$ sudo -i
(base) root@distributedtraining:~# jupyter lab build --dev-build=False --minimize=False
[LabBuildApp] JupyterLab 3.2.9
[LabBuildApp] Building in /opt/conda/share/jupyter/lab
[LabBuildApp] Building jupyterlab assets (production, not minimized)
(base) root@distributedtraining:~# jupyter labextension list
JupyterLab v3.2.9
/opt/conda/share/jupyter/labextensions
        nbdime-jupyterlab v2.1.1 enabled OK
        jupyterlab-jupytext v1.3.8+dev enabled OK (python, jupytext)
        jupyterlab_pygments v0.2.2 enabled OK (python, jupyterlab_pygments)
        @jupyterlab/server-proxy v3.2.1 enabled OK
        @jupyterlab/git v0.37.1 enabled OK (python, jupyterlab-git)
        @jupyter-widgets/jupyterlab-manager v3.1.0 enabled OK (python, jupyterlab_widgets)

Other labextensions (built into JupyterLab)
   app dir: /opt/conda/share/jupyter/lab
        beatrix_jupyterlab v3.1.7 disabled OK
        jupyterlab-plotly v5.8.0 enabled OK
        plotlywidget v4.14.3 enabled OK
        tensorflow_model_analysis v0.34.1 enabled OK
        wit-widget v1.8.1 enabled OK
        xai_tabular_widget v0.1.0 enabled OK

Assign GPU device to worker

It seems that it is imperative to assign a particular GPU to a worker as we have 2 Tesla P4 GPUs and 2 workers. If we don’t then there is failure to allocate GPU memory adequately. This line of code does that.

os.environ['CUDA_VISIBLE_DEVICES']=str(index)

Sorry, something went wrong. Reload?
Sorry, we cannot display this file.
Sorry, this file is invalid so it cannot be displayed.

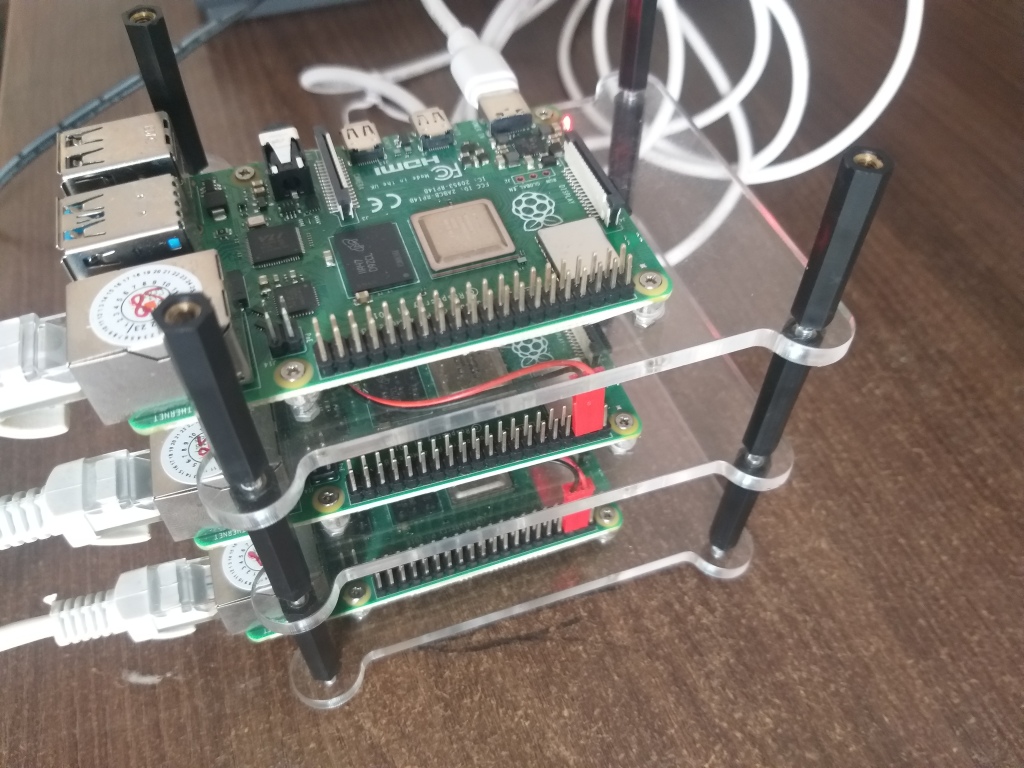
k3s on Raspberry Pi 4 Model B With 8GB

This is to be updated with more details

Network Switch

There are the IPs assigned to by Raspberry PIs. I think they are being assigned somehow to the same Pi

everytime. I have to explore how to fix them so that they are static always.

Setup Password-less SSH

pi@raspberrypi:~ $ mkdir ~/.ssh
pi@raspberrypi:~ $  touch ~/.ssh/authorized_keys
pi@raspberrypi:~ $  chmod 0700 ~/.ssh
pi@raspberrypi:~ $  chmod 0600 ~/.ssh/authorized_keys
pi@raspberrypi:~ $ vi ~/.ssh/authorized_keys

Copied the contents of ~/.ssh/id_rsa.pub which I generated to the file ~/.ssh/authorized_keys of each PI.

pi@raspberrypi:~ $ sudo curl -sfL https://get.k3s.io | K3S_TOKEN="K10e9d200a500ad44ba0072af9ea9f38d19a40cfc4cfd96d753d01466c618007f8e::server:bb58186ddf5f34800004affa48c44a12" K3S_URL="https://192.168.1.29:6443" K3S_NODE_NAME="rpiworker3" sh -
[INFO]  Finding release for channel stable
[INFO]  Using v1.22.7+k3s1 as release
[INFO]  Downloading hash https://github.com/k3s-io/k3s/releases/download/v1.22.7+k3s1/sha256sum-arm.txt
[INFO]  Skipping binary downloaded, installed k3s matches hash
[INFO]  Skipping installation of SELinux RPM
[INFO]  Skipping /usr/local/bin/kubectl symlink to k3s, already exists
[INFO]  Skipping /usr/local/bin/crictl symlink to k3s, already exists
[INFO]  Skipping /usr/local/bin/ctr symlink to k3s, already exists
[INFO]  Creating killall script /usr/local/bin/k3s-killall.sh
[INFO]  Creating uninstall script /usr/local/bin/k3s-agent-uninstall.sh
[INFO]  env: Creating environment file /etc/systemd/system/k3s-agent.service.env
[INFO]  systemd: Creating service file /etc/systemd/system/k3s-agent.service
[INFO]  systemd: Enabling k3s-agent unit
Created symlink /etc/systemd/system/multi-user.target.wants/k3s-agent.service → /etc/systemd/system/k3s-agent.service.
[INFO]  systemd: Starting k3s-agent
pi@raspberrypi:~ $ 

PI cluster with case

Master Node

pi@raspberrypi:~ $ sudo k3s kubectl get node
NAME          STATUS   ROLES                  AGE     VERSION
rpiworker1    Ready    <none>                 3d23h   v1.22.7+k3s1
rpiworker2    Ready    <none>                 45h     v1.22.7+k3s1
raspberrypi   Ready    control-plane,master   4d22h   v1.23.4+k3s1
rpiworker3    Ready    <none>                 67s     v1.22.7+k3s1

List from my Mac

anu@Aarushis-MacBook-Pro ~ % kubectl get pods --namespace kube-system --kubeconfig ~/.kube/config-berry-pi
NAME                                      READY   STATUS      RESTARTS       AGE
helm-install-traefik-crd-65xpk            0/1     Completed   0              5d23h
helm-install-traefik-74pkr                0/1     Completed   2              5d23h
local-path-provisioner-6c79684f77-tbcqt   1/1     Running     11 (13m ago)   5d23h
coredns-5789895cd-qrps6                   1/1     Running     8 (13m ago)    5d23h
svclb-traefik-cnlw6                       2/2     Running     16 (13m ago)   5d23h
svclb-traefik-8v7kl                       2/2     Running     12 (12m ago)   5d
traefik-58b759688b-x7j4d                  1/1     Running     8 (13m ago)    5d23h
svclb-traefik-dqrwb                       2/2     Running     8 (12m ago)    2d22h
metrics-server-7cd5fcb6b7-xz5jp           1/1     Running     11 (13m ago)   5d23h
svclb-traefik-dxhbx                       2/2     Running     2 (12m ago)    25h
anu@Aarushis-MacBook-Pro ~ % 

Custom Code to create Ragged Tensor

I have been preparing to write a longer version about Tensorflow with Tikz diagrams. Eventually there will be sufficient number of pages to write a short book. And I have been looking for tools to generate the book’s text, Tikz diagrams and the code as a PDF book.

I know that descriptions are important too and just colorful diagrams won’t cut it. But I am trying. I will add

more descriptions and diagrams to this same post till I am satisfied.

RaggedTensor is a tensor with one or more ragged dimensions, which are dimensions whose slices may have different lengths.

tf.RaggedTensor is part of the TensorFlow library. This code attempts to do the same.

We start with the source [3, 1, 4, 2, 5, 9, 2] and a template showing the row position like this [0, 0, 0, 0, 1, 1, 2].

Our map is like this.

The longest repeating value in the template is 0. So we will store the first 4 values(3 ,1, 4, 2) from the source in row 1. Row 2 has values 5 and 9. Since we need 4 values we fill -999 in the next two positions in row 2. Row 3 now has only value 2. The other 3 positions are filled with -999.

There are many ways to code this but if you start with

elements, index, count = tf.unique_with_counts([0, 0, 0, 0, 1, 1, 2])
print('Elements ',elements)

which gives all the data you need then the following code fills up the ‘ragged’ tensor with the ‘filler’

Note : I have hard-coded if( slice.shape[0] < 4): this. This is the length of the longest repeating value but you can obtain this from tf.unique_with_counts and pass it. I also don’t account for missing values – [0, 0, 0, 0, 2]. But elements in the code above gives you what is present. So you could add a row of ‘fillers’ using a simple loop when you find a value missing.


import tensorflow as tf

fill_value = tf.constant([-999]) # value to insert
elements, index, count = tf.unique_with_counts([0, 0, 0, 0, 1, 1, 2])
print('Elements ',elements)
values = [3, 1, 4, 1, 5, 9, 2]

ta = tf.TensorArray(dtype=tf.int32,size=1, dynamic_size=True,clear_after_read=False)

def fill_values(slice,i):
    slices = slice
    if( slice.shape[0] < 4):
        for j in range( 4 - slice.shape[0] ):
            slices = tf.concat([slices,fill_value],0)
            tf.print('Fill ',slices)
    return ta.write(i,slices)

def slices( begin, c, i, filler ):
    slice = tf.slice(  values,
                       begin=[ begin ],
                       size=[ c[i] ])
    begin = begin + c[i]
    tf.print('Slice' , slice)
    ta = fill_values(slice,i)
    print('TensorArray ', ta.stack())
    # Note: The output of this function should be used.
    # If it is not, a warning will be logged or an error may be raised.
    # To mark the output as used, call its .mark_used() method.
    return [begin , c, tf.add(i, 1), filler]

def condition( begin, c, i, _ ):
    return tf.less(i, tf.size(c))

i = tf.constant(0)
filler = tf.constant(-999)
r = tf.while_loop(  condition,slices,[0, count, i, filler ])
print('TensorArray ', ta.stack())

Write logic using loop using TensorFlow

The programming paradigm one adopts when coding TensorFlow is not what I use normally. One has to learn a few tricks to get used to it. When you also consider the eager mode introduced in TensorFlow 2 it can be hard.

Recently I answered a question on Stackoverflow. The question was about writing a loop to take advantage of the GPU.My desktop has a old NVIDIA GPU and my Mac has a AMD GPU. So neither was useful to test this code. But I managed to rewrite the loop using TensorFlow 2.

The original code is this.


def multivariate_data(dataset, target, start_index, end_index, history_size,
                      target_size, step, single_step=False):
  data = []
  labels = []
  start_index = start_index + history_size
  if end_index is None:
    end_index = len(dataset) - target_size
  #print(history_size)
  for i in range(start_index, end_index):
    indices = range(i-history_size, i, step)
    data.append(dataset[indices])
    if single_step:
      labels.append(target[i+target_size])
    else:
      labels.append(target[i:i+target_size])
  return np.array(data), np.array(labels)

I will add a diagram or two with some explanation later on. This type of diagram is drawn using /Library/TeX/texbin/pdflatex and my Tikz editor. I have a plan to generate a PDF from the text and diagrams using tools later.

This creates a empty 1-D tensor and fills the values in it based on conditions in the loop. It is as simple as it gets but can be used to understand how to operate loops.

If you notice it is also possible to pick ranges from the source and move to the target like this. This line of code begs for a diagram as higher the rank of a tensor the more complicated it is to visualize what is happening. Remember this is a 1-D or Rank 0 tensor.

self._data = tf.concat([self._data,[tf.gather(dataset, i)]],0)

The final code is this.

import tensorflow as tf

class MultiVariate():
    def __init__(self):
        self._data = None
        self._labels = None

    def multivariate_data(self,
                          dataset,
                          start_index,
                          end_index,
                          history_size,
                          target_size,
                          single_step=False):
         start_index = start_index + history_size
         print("end_index ", end_index)
         print("start_index ", start_index)
         if self._data is None:
             self._data = tf.cast(tf.Variable(tf.reshape((), (0,))),dtype=tf.int32)
         if self._labels is None:
             self._labels = tf.cast(tf.Variable(tf.reshape((), (0,))),dtype=tf.int32)
         if end_index is None:
            end_index = len(dataset) - target_size

         def cond(i, j):
             return tf.less(i, j)

         def body(i, j):
             #A range of values are gathered
             self._data = tf.concat([self._data,[tf.gather(dataset, i)]],0)
             if ( i == start_index ): #Showing how A range of values are gathered and appended
                self._data = tf.concat([self._data,tf.gather(dataset, tf.range(1, 3, 1))],0)
             return tf.add( i , 1 ), j

         _,_ = tf.while_loop(cond, body, [start_index,end_index],shape_invariants=[start_index.get_shape(), end_index.get_shape()])
         return self._data

mv = MultiVariate()
d =    mv.multivariate_data(
                      tf.constant([1,88,99,4,5,6,7,8,9]),
                      tf.constant(2),
                      tf.constant(8),
                      tf.constant(1),
                      tf.constant(2),
                      tf.constant(2))
print("print ",d)

Provision a VM using Packer and Vagrant

About 8 years back I worked for a company serving customers of the Payment Card Industry. They had a dire need of Infrastructure as Code(IaC) to build a Windows Active-Passive Cluster with Connect:Direct and engineers spent day and night to set it up manually. The ruckus created by that is still etched in my mind.

Now when I tried a simple recipe it worked like a charm. It isn’t very complicated as it is a simple test.

I started with this repo.

C:\Packer\ubuntu\ubuntu>packer build -only=vmware-iso -var='ssh_fullname=mirage' -var='ssh_password=mirage' -var-file=ubuntu1804.json ubuntu.json
vmware-iso: output will be in this color.

Warnings for build 'vmware-iso':

* A checksum type of 'none' was specified. Since ISO files are so big,
a checksum is highly recommended.
* Your vmx data contains the following variable(s), which Packer normally sets when it generates its own default vmx template. This may cause your build to fail or behave unpredictably: numvcpus, memsize

==> vmware-iso: Retrieving ISO
==> vmware-iso: Trying /Volumes/Storage/software/ubuntu/ubuntu-18.04.4-server-amd64.iso
==> vmware-iso: Trying /Volumes/Storage/software/ubuntu/ubuntu-18.04.4-server-amd64.iso?checksum=a5b0ea5918f850124f3d72ef4b85bda82f0fcd02ec721be19c1a6952791c8ee8
==> vmware-iso: /Volumes/Storage/software/ubuntu/ubuntu-18.04.4-server-amd64.iso?checksum=a5b0ea5918f850124f3d72ef4b85bda82f0fcd02ec721be19c1a6952791c8ee8 => C:/Packer/ubuntu/ubuntu/Volumes/Storage/software/ubuntu/ubuntu-18.04.4-server-amd64.iso
==> vmware-iso: Creating floppy disk...
vmware-iso: Copying files flatly from floppy_files
vmware-iso: Copying file: http/preseed.cfg
vmware-iso: Done copying files from floppy_files
vmware-iso: Collecting paths from floppy_dirs
vmware-iso: Resulting paths from floppy_dirs : []
vmware-iso: Done copying paths from floppy_dirs

Add box to Vagrant

C:\Packer\ubuntu\ubuntu\box\vmware>vagrant box add ubuntu1804-0.1.0.box --name vmwarepackeransible
==> box: Box file was not detected as metadata. Adding it directly...
==> box: Adding box 'vmwarepackeransible' (v0) for provider:
box: Unpacking necessary files from: file://C:/Packer/ubuntu/ubuntu/box/vmware/ubuntu1804-0.1.0.box
box:
==> box: Successfully added box 'vmwarepackeransible' (v0) for 'vmware_desktop'!

Initialize

C:\Packer\ubuntu\ubuntu\box\vmware>vagrant init vmwarepackeransible
A `Vagrantfile` has been placed in this directory. You are now
ready to `vagrant up` your first virtual environment! Please read
the comments in the Vagrantfile as well as documentation on
`vagrantup.com` for more information on using Vagrant.

C:\Packer\ubuntu\ubuntu\box\vmware>vagrant up
Bringing machine 'default' up with 'vmware_desktop' provider...
==> default: Cloning VMware VM: 'vmwarepackeransible'. This can take some time...
==> default: Verifying vmnet devices are healthy...
==> default: Preparing network adapters...
==> default: Starting the VMware VM...
==> default: Waiting for the VM to receive an address...
==> default: Forwarding ports...
default: -- 22 => 2222
==> default: Waiting for machine to boot. This may take a few minutes...
default: SSH address: 127.0.0.1:2222
default: SSH username: vagrant
default: SSH auth method: private key
default:
default: Vagrant insecure key detected. Vagrant will automatically replace
default: this with a newly generated keypair for better security.
default:
default: Inserting generated public key within guest...
default: Removing insecure key from the guest if it's present...
default: Key inserted! Disconnecting and reconnecting using new SSH key...
==> default: Machine booted and ready!
==> default: Configuring network adapters within the VM...
==> default: Waiting for HGFS to become available...
==> default: Enabling and configuring shared folders...
default: -- C:/Packer/ubuntu/ubuntu/box/vmware: /vagrant

Shell provisioner in Vagrantfile

config.vm.provision "shell", inline: <<-SHELL
add-apt-repository ppa:openjdk-r/ppa -y
apt-get update
echo "\n----- Installing Java 8 ------\n"
apt-get -y install  openjdk-8-jdk
update-alternatives --config java

SSH into vagrant and check

SHELLvagrant@vagrant:~$ java -version
openjdk version "1.8.0_252"
OpenJDK Runtime Environment (build 1.8.0_252-8u252-b09-1~18.04-b09)
OpenJDK 64-Bit Server VM (build 25.252-b09, mixed mode)

There are other scenarious that are complicated but a simple test like this works as expected.

Dune is a Ocaml build system

Here is my attempt to properly build a toy Ocaml project using Dune.

Since this is the learning phase the Ocaml code may not be idiomatic.

My unit test framework is Alcotest

As is the case with other Ocaml tools and techniques information about this is sketchy. I wish there were more articles and examples as it is fun to work with this language..

I will add more details as I research this further. But for now here is a brief description of the dune build file.

  • dune runtest executes  all the tests
  • Dune does not install dependencies automatically . So, for example, I have to execute ‘opam install alcotest’. That is how one installs any opam package we need generally.

graph.opam

This looks like the file in which one specifies the framework versions and build instructions.

opam-version: "2.0"
authors: [ "Mohan" ]
synopsis: "Learning Dune"
description: """
Learning Dune
"""
tags: []
depends: [
"ocaml" {
>= "4.02.3"}
"dune"
"alcotest" {with-test}
]
build: [
["dune" "subst"] {pinned}
["dune" "build" "-p" name "-j" jobs]
["dune" "runtest" "-p" name "-j" jobs] {with-test}
]

Dune dependencies

This specifies the dependencies and the modules. My code module is ‘graph‘ and my test module is ‘kruskaltest‘.

  •  
(library
(modules graph)
(name graph)
)
(test
(name kruskaltest)
(modules kruskaltest)
(libraries alcotest graph))
view raw dune.lisp hosted with ❤ by GitHub

Main module

type edge = ( int * int * int ) list
module type EDGECOMPARE = sig
type t
val compare : 'a list -> 'a list ->bool
end
module EDGECOMPARE_weight : EDGECOMPARE with type t = edge = struct
type t = edge
let compare l r = ( List.nth l ( List.length l/ 2 )) == ( List.nth r (List.length r/2))
end
view raw kruskal.ml hosted with ❤ by GitHub

Test

let testcompare () = Alcotest.(check bool) "Test for weight comparison" true (Graph.EDGECOMPARE_weight.compare [1,2,4] [ 5,6,7] )
let () =
Alcotest.run "Weights"
[
("test compare weights of edges", [
Alcotest.test_case "Compare weights" `Quick testcompare;
]);
]
view raw kruskaltest.ml hosted with ❤ by GitHub

mirage@mirage:~/theorem$ dune runtest
kruskaltest alias runtest
Testing Weights.
This run has ID `D7DAB7A8-A60A-4522-9732-54FAE2331A72`.
[OK] test compare weights of edges 0 Compare weights.
The full test results are available in `/home/mirage/theorem/_build/default/_build/_tests/D7DAB7A8-A60A-4522-9732-54FAE2331A72`.
Test Successful in 0.000s. 1 test run.

R Reference classes

A pure OO approach and a functional representation of it are at loggerheads. That is evident when one tries to adopt an OO approach using a powerful functional language. That is my personal opinion.

R has many Object-oriented features built into it.

R has three object oriented (OO) systems: [[S3]], [[S4]] and [[R5]].

Reference classes are one such feature.

OO

Let us consider this data. The id is that of a Subject who is in
a room where monitoring equipment gathers some data. There are several visits to gather this data.

id visit room value timepoint
14 0 bedroom 6 53
14 0 bedroom 6 54
15 0 bedroom 2.75 56

The idea that this code is based on is from Martin Fowler’s book Analysis Patterns Reusable Object Models. The chapter on Observations and Measurements has a diagram roughly equivalent to the
one shown at the top.

The code is lightly tested several times but without unit tests.

library(plyr)
library(dplyr)
library(purrr)

CompoundUnit <- setRefClass("CompoundUnit",
fields = list(micrograms = 'numeric',
cubicmeter = 'numeric'))

Location <- setRefClass("Location",
fields = list( room = 'character'),
methods=list(getlocation = function(){
room
},
summary = function(){
paste('Room [' , room , ']')
}))

library(objectProperties)
# An Enum which could have behaviour associated with it.
# This is convoluted but the only way I know to represent constants and validate them.
#
###############################################################################

MeasurementVisitEnum.gen <- setSingleEnum("MeasurementVisit",levels = c('0', '1', '2'))
par.gen <- setRefClass("Visit",
properties(fields = list(visit = "MeasurementVisitSingleEnum"),
prototype = list(visit =
new("MeasurementVisitSingleEnum",
'0'))))

What is the significance of this convoluted code ?

It restricts the values that are set to 0.1 and 2. It is like the Java enum

But this is not strictly a requirement here. It is just that there is a facility to identify erroneous data if we need it.

> MeasurementVisitEnum.gen par.gen visits visits$visit visits$visit visits$visit visits$visit <- as.character(3)
Error in (function (val) :
Attempt to set invalid value on 'visit': value '3' does not belong to level set
( 0, 1, 2 )


TimePoint <- setRefClass("TimePoint",
fields = list(time = 'numeric'))

Quantity <- setRefClass("Quantity",
fields = list(amount = "numeric",
units = CompoundUnit))

Measurement encapsulates the quantity, the time point and the visit number. So, for example, during visit 0, at this time point the quantity was observed. This type of encapsulation in the true spirit of OO has its
disadvantages as we will see later.

Measurement <- setRefClass("Measurement",
fields = list(
quantity = "Quantity",
timepoint = "TimePoint",
visit = "Visit"),
methods=list(getvisit = function(){
visit$visit
},getquantity = function(){
quantity
})
)

Subject <- setRefClass("Subject",
fields = list( id = "numeric",
measurement = "Measurement",
location = "Location"),
methods=list(getmeasurement = function()
{
measurement
},
getid = function()
{
id
},
getlocation = function()
{
location
},
summary = function()#Implement other summary methods in appropriate objects as per their responsibilities
{
paste("Subject summary ID [",id,"] Location [",location$summary(),"]")
},show = function(){
cat("Subject summary ID [",id,"] Location [",location$summary(),"]\n")
})
)

LongitudinalDatum is the class LongitudinalData inherits from. This inheritance is shown as an example. Not all methods that should belong in the super class are properly added. There are many methods in the sub class that can be moved a level up.

subsummary in the super class can be called from the sub class. The line if( subject(x) == id){ in the sub class LongitudinalData calls this super class method.

LongitudinalDatum  datum

measurements <<- list()
load(datum)

},load = function( df ){
by(df, 1:nrow(df), function(row) {
visits <- par.gen$new()
visits$visit <- as.character(row$visit)

u <- CompoundUnit$new( micrograms = 1,
cubicmeter = 1 )

q <- Quantity$new(amount = row$value,
units = u )

t <- TimePoint$new(time = row$timepoint)

m <- Measurement$new(
quantity = q,
timepoint = t,
visit = visits)

l <- Location$new( room = as.character(row$room))

s <- Subject$new( id = row$id,
measurement = m,
location = l)
measurements <<- c( measurements, s )

})

},
getmeasurementslength = function(){
length(measurements)
},
findsubject = function( id ){
result % map(., function(x) {
if( subject(x) == id){
result <<- x # Warning message is benign for this example. result
#cannot be a class state. It is really local.
}
}
)
result

},
visit = function( sub,v ){
measurementsvisit % map(., function(x) {
m <- x$getmeasurement()
if (m$getvisit() == v && x$getid() == sub$getid() ){
measurementsvisit <<- c(measurementsvisit,x)
}
}

)

list(visit = measurementsvisit )
}
},
room = function( t, room ){
if( length( t) == 0 ){
c('NA')
}else{
measurementsvisitroom % map(., function(x) {
if( x$getlocation()$getlocation() == room )
measurementsvisitroom <% map(., function(y) {
if (x$getid() == y$getid() ){
m <<- x$getmeasurement()
summaries <% summary
}
},subjectsummary = function( subject ){
filteredmeasurements <-
keep(measurements, function(x){
x$getid() == subject$getid()
})
groupedmeasurements % lapply(function(x){
m <% rbind_all()
dataColumns <- c('amount')

ddply(groupedmeasurements,c('visit','location'),function(x)
colSums(x[dataColumns]))
}

)
)

How does this work ?

The data is loaded into an object hierarchy in the load function. I did observe that it was slow most probably because my Eclipse StatET for R setup needs more memory.

Since the methods are all encapsulated by the class I am using the reference to call methods. The result of findsubject is passed to subjectsummary because I am piping the result of one method to the next.

ld <- LongitudinalData$new()

out % ld$subjectsummary()
print(out)

So here the result of findsubject(14) is passed as the first parameter when visit(0) is called. 0 becomes the second parameter.

out % ld$visit(0) %>% ld$room("bedroom")

The final result from this pipeline is whatever is returned by the last method room("bedroom").

I would like to reassert that this is just one way of combining multiple methods using Reference classes. There are much more powerful functional approaches that don’t require this many lines of code. This example illustrates a particular Object-oriented approach.

Flattening the Reference classes

The OO hierarchy here does not seem to be malleable when used with some R packagea like dplyr. Try as I may, I cannot coerce the Reference classes into a R data frame and pipe it through stages using dplyr. Remember I want to use functions like map and filter to get the data out of these reference clasees in a shape that I want.

So I abandon my OO approach and flatten the objects and create a data frame. Now I get back the data in the shape I want.

groupedmeasurements %
lapply(
function(x){
m <% rbind_all()

This is how one gets the following output.

out % ld$subjectsummary()
print(out)

visit location amount
0 bedroom 12.00
0 dining room 2.75
0 living room 2.75
0 room 5.50
0 tv room 2.75
1 room 2.75

Conclusion

This exercise has not helped me determine in which context R’s Reference classes are specifically used. The other OO systems like S3 and S4 may be more useful but this article is about RC’s. Why should I flatten my object hierarchy to reshape my data in a convenient way ? There may be specialized R packages that use the OO approach and expose API’s but I am not aware of them. So at this time I understand that there is a dichotomy between RC’s and the powerful functional approach. I personally like to use the functional programming paradigm when dealing with data.
Joy of OCaml

screenshot-from-2016-12-03-19-14-34

I have spent most of last week with my Emacs editor and the OCaml development environment. Since I have some OCaml code to complete I will add more details soon.

Suffice it to say that this setup taxed me so much. OPAM does not seem to install easily in Windows. As is my wont in such cases I started with Cygwin and after two days switched to a Ubuntu VM. I didn’t think I was gaining much by reporting Cygwin permission issues to owners of OPAM Windows installers.

Emacs company mode for autocompletion

The toolchain includes company as well as Merlin
and Tuareg.

screenshot-from-2016-12-03-19-00-53

Utop is a toplevel for OCaml

screenshot-from-2016-12-03-19-10-58

Emacs elisp

It looks like this at this time and I use Gist because WordPress does not support Lisp or OCaml or Haskell yet. Filed a support ticket.


(package-initialize)
(load "/home/mohan/.opam/4.02.1/share/emacs/site-lisp/tuareg-site-file")
(let ((opam-share (ignore-errors (car (process-lines "opam" "config" "var"
"share")))))
(when (and opam-share (file-directory-p opam-share))
;; Register Merlin
(add-to-list 'load-path (expand-file-name "emacs/site-lisp" opam-share))
(autoload 'merlin-mode "merlin" nil t nil)
;; Automatically start it in OCaml buffers
(add-hook 'tuareg-mode-hook 'merlin-mode t)
(add-hook 'caml-mode-hook 'merlin-mode t)
;; Use opam switch to lookup ocamlmerlin binary
(setq merlin-command 'opam)))
(company-mode)
(add-to-list 'load-path "/home/mohan/.opam/4.02.1/share/emacs/site-lisp")
(require 'ocp-indent)
(autoload 'utop-minor-mode "utop" "Minor mode for utop" t)
(autoload 'utop-setup-ocaml-buffer "utop" "Toplevel for OCaml" t)
(autoload 'merlin-mode "merlin" "Merlin mode" t)
(utop-minor-mode)
;; Important to note that setq-local is a macro and it needs to be
;; separate calls, not like setq
(setq-local merlin-completion-with-doc t)
(setq-local indent-tabs-mode nil)
(setq-local show-trailing-whitespace t)
(setq-local indent-line-function 'ocp-indent-line)
(setq-local indent-region-function 'ocp-indent-region)
(custom-set-variables
;; custom-set-variables was added by Custom.
;; If you edit it by hand, you could mess it up, so be careful.
;; Your init file should contain only one such instance.
;; If there is more than one, they won't work right.
'(package-selected-packages (quote (company))))
(custom-set-faces
;; custom-set-faces was added by Custom.
;; If you edit it by hand, you could mess it up, so be careful.
;; Your init file should contain only one such instance.
;; If there is more than one, they won't work right.
)
; Make company aware of merlin
(with-eval-after-load 'company
(add-to-list 'company-backends 'merlin-company-backend))
; Enable company on merlin managed buffers
(add-hook 'merlin-mode-hook 'company-mode)

view raw

ocaml.lisp

hosted with ❤ by GitHub

More about OCaml code later. This creates an associative list of tuples containing characters and the number of times they occur in a String. MultiSet is a module that is not shown either but as I mentioned I have more to write about this wonderful programming language.


let insert l a =
if List.mem_assoc a l
then
let n = List.assoc a l in (a, n+1)::(List.remove_assoc a l)
else (a, 1)::l
let letters (word : string) : char MultiSet.t =
let rec insert (l : char MultiSet.t) (c : string) (i : int) : char MultiSet.t =
if ( String.length c > 1 ) then
insert ( MultiSet.insert l (String.get c i) ) ( String.sub c 1 ((String.length c) – 1) ) 0
else
MultiSet.insert l (String.get c 0)
in insert MultiSet.empty word 0
;;

view raw

letter.ml

hosted with ❤ by GitHub

Polyglot programming using Jenkins

jenkins Facility for languages develops when one does not squander existing opportunities to code. That is what I think.

Jenkins, the CI enabler supports a few languages like Python and Groovy. The Python package I used to make the Rest API calls is ‘Python Jenkins’.It is interesting to note that run_script executes Groovy code.

I didn’t test it exactly when the Unix server runs out of disk space but assumed the text from the console output will match.Moreover the encryption routine works as expected but the decryption function doesn’t work. It seems that since I call the Rest API there could be a encryption/decryption key mismatch.


'''
Created on Oct 12, 2016

@author: Mohan Radhakrishnan

This python module gets the console output of the latest
build and if the text 'No space left on device' is found in
the output it sends a mail.
I've taken liberties with the 'functional paradigm'

'''
import smtplib
import jenkins
import os
def main():

overrideenvironmentvariables()

server = jenkins.Jenkins('http://localhost:8080', username='Mohan', password='Welcome1')

notifydisaster(server)

'''
Notify
'''
def notifydisaster( server ):
print( getconsoleoutput(server) )
name,buildnumber,consoleoutput = getconsoleoutput(server)
if (consoleoutput.find("Caused by: java.io.IOException: No space left on device") != -1):
print("Caused by: java.io.IOException: No space left on device")
sendmail( name,buildnumber )

'''
Notify
Password Encryption/decryption code has to be tested and used
'''
def sendmail(name,buildnumber):
smtp = smtplib.SMTP('smtp.gmail.com', 587)
smtp.ehlo()
smtp.starttls()
smtp.login("x.y@z.com","Password")
smtp.sendmail('x.y@z.com', 'x.y@z.com', 'Subject: No space left on device\n \
Job ' + name + ' Build ' + str(buildnumber) + ' fails due to lack of disk space')

'''
Get the console output of the particular
Job's build
'''
def getconsoleoutput(server):
information = getJobName(server)
if information:
return information[ 0 ]['name'] ,getlastjobDetails(server),server.get_build_console_output(information[ 0 ]['name'], getlastjobDetails(server))

'''
Get Job and other details
and filter the Job we are interested in
'''
def getJobName(server):
jobs = server.get_all_jobs(0)
filtercriterion = ['CITestPipeline']

return list(filter( lambda d: d['fullname'] in filtercriterion, jobs))

'''
Get Job and other details
Return '0' as the build number assuming
it signifies that there is no such build number
'''

def getlastjobDetails(server):
information = getJobName(server)
if information:
last_build_number = server.get_job_info(information[ 0 ]['name'])['lastCompletedBuild']['number']
return last_build_number
else:
return 0

'''
Attempt here to encrypt Passwords using Jenkins' key
Not tested properly
'''
def encrypt(server ):
value = server.run_script("""
secret = hudson.util.Secret.fromString("Password")
println secret.getEncryptedValue()
println secret.getPlainText()
""")
print (value)

def decrypt(server ):
decryptedvalue = server.run_script("""
secret = hudson.util.Secret.fromString("aiJREkuBjWHX9UWIyhEzwnnAJReuZnQVEtUr0KgvXKg")
println hudson.util.Secret.toString(secret)
""")
print (decryptedvalue)
return decryptedvalue
'''
Override this proxy setting as we don't
need it and it causes an error.
'''
def overrideenvironmentvariables():
os.environ["HTTP_PROXY"] = ''

if __name__=="__main__":
main()